Make Your Own Cornhole: a DIY Tutorial

What is a rustic barn wedding without a game of cornhole? Some may ask, "what is a cornhole?" Having grown up in southern California, I too would have asked that question not too long ago; but after spending a few years in rural Pennsylvania for college, I'd have to say that "cornhole" is no longer such a foreign term. I think my midwesterner friends would agree. Cornhole, aka "bean bag toss" or just "bags" is a popular carnival or tailgate game more often played in the midwest or east. The objective of the game is to toss a bean bag, or corn bag in this case, into a hole at the end of an elevated board. We decided to make our own cornhole game for our wedding cocktail hour along with giant Jenga for our wonderful guests to play. Now that the wedding is over, it serves as another piece of entertainment for our future backyard BBQs, picnics, and parties.
Supplies:
4 - 2x4'' x 8'
4'x4' plywood board (1/2'' thick)
1 box of 2 1/2 inch screws
Circular Saw
Jigsaw
Orbit sander/ sandpaper
Power drill
Compass (to draw a circle)
(optional, can replace 1 2x4 with 4 12'' table legs from home depot)
Hemp Seed Oil and paper towel
Paint (optional)
Step 1:
Cut your 4'x4' plywood into 2 pieces, exactly 2'x4'


We ended up buying a 4'x8' board so we could use the leftover wood for our upcoming projects.
Step 2:
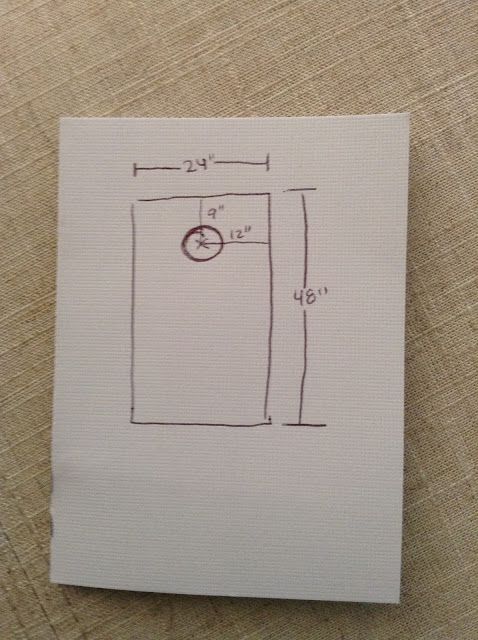
Mark an x on your board 9 inches from the top and 12 inches from the side. Using the x as a center point, use your compass to draw a circle with a 6 inch diameter. Diagram shown below:

To learn how to make the traditional cornhole legs, click on the following link from Cornhole-How-To
Step 11:
Supplies:
4 - 2x4'' x 8'
4'x4' plywood board (1/2'' thick)
1 box of 2 1/2 inch screws
Circular Saw
Jigsaw
Orbit sander/ sandpaper
Power drill
Compass (to draw a circle)
(optional, can replace 1 2x4 with 4 12'' table legs from home depot)
Hemp Seed Oil and paper towel
Paint (optional)
Step 1:
Cut your 4'x4' plywood into 2 pieces, exactly 2'x4'


Step 2:
Mark an x on your board 9 inches from the top and 12 inches from the side. Using the x as a center point, use your compass to draw a circle with a 6 inch diameter. Diagram shown below:

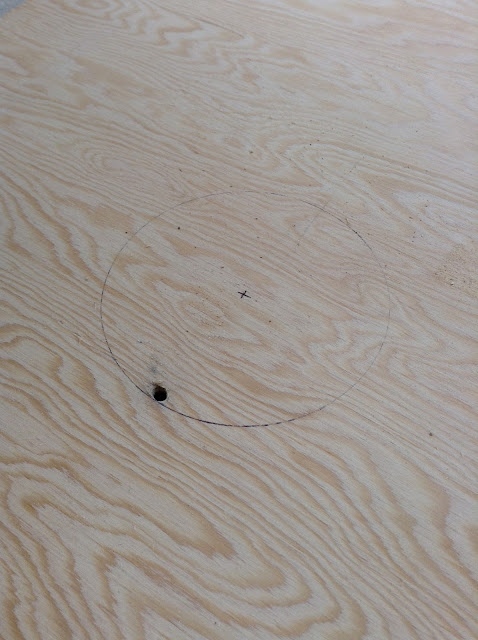
Step 3:
At the inner edge of the circle you drew, drill a hole about 1cm wide.

Step 4:
Insert jigsaw blade into the hole you created and continue cutting along the line you drew. Most jigsaws will have a laser beam to help you know where your blade is going.

You will then end up with something like this.....though hopefully with straighter edges.
 |
| Our first attempt at using a jigsaw, hence the jagged edges. If your edges turn out like ours did, you can use a file to shave down the jagged edges and finish it off with a sander.
Step 5:
Cut your 2x4s into:
4 - 4' pieces (2 lengthwise sides per cornhole board)
4 - 21'' pieces (2 widthwise sides per cornhole board)
For the legs, we used a 14 inch designed table legs we bough from home depot to give it more of a vintage look.
To make a regulation corn hole board you will need to cut an additional 4 pieces 16'' each for each of the legs.
Step 6:
Build your frame using the diagram below:

Use 2 1/2 inch screws, 2 screws per corner.
Step 7:
Place your 2'x4' board onto your frame.
Screw board onto frame using 2 1/2 inch screws.
We used 6 screws per side, 2 in each corner, then 2 evenly spaced along the lengthwise edge of the board.
Step 8:
Sand all the surfaces with 120 grit sand paper. We used an orbit sander which made the whole process a lot faster than if we had done it by hand.
Step 9:
Paint it!
Using a bit of high school geometry, we drew out chevron stripes and used painter's tape to paint the white stripes within the lines.

We let the white paint dry overnight, then repeated the steps to fill in the rest of the stripes in blue.
Lastly, we added a V for Vuong!

Step 10:
Add the legs.
We used the 2 1/2 inch screws to screw in 2 legs under the top of the board. We then measured the width across the corner and added a piece of wood for support. We screwed this support piece to the leg itself, as well as to the short and long sides of the base.
   |
To learn how to make the traditional cornhole legs, click on the following link from Cornhole-How-To
Step 11:
Using a towel dipped in hemp seed oil, generously rub oil into the wood to help seal the wood and paint.
Let dry overnight before use.
Step 12:
Play!
If you have bean bags at home, you are ready to play! You can also purchase them, or like in our case, make them yourselves!

Click on the link below to learn how to play.
I love how the colors and pattern of the bean bags and cornholes coordinate!
ReplyDeleteThanks!! :D
Delete